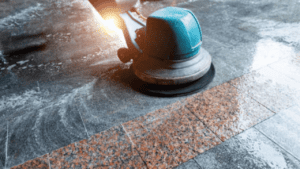
If you want to adjust the squeegee on a floor scrubber, follow these steps:
1. Find the squeegee adjustment knobs or levers on the machine.
2. Turn the knobs or push/pull the levers to adjust the height or angle of the squeegee. If the squeegee is too low or too high, it may not properly clean and dry the floor surface. Adjusting the squeegee can ensure efficient and effective floor scrubbing.
Taking a few moments to adjust the squeegee will help you achieve better cleaning results and maintain the longevity of your floor scrubber.
Understanding The Importance Of The Squeegee Adjustment
When it comes to floor scrubbing machines, one component that plays a crucial role in their cleaning performance is the squeegee. The squeegee is responsible for removing excess water and debris from the floor after it has been scrubbed, leaving behind a clean and dry surface.
However, many people underestimate the importance of properly adjusting the squeegee, resulting in subpar cleaning results and potential damage to the machine.
The role of the squeegee in floor scrubbing machines
In order to understand why squeegee adjustment is important, it’s necessary to comprehend the role of the squeegee in floor scrubbing machines. The squeegee is typically made of rubber and is positioned at the back of the machine, behind the brush or pad.
As the machine moves forward, the brush or pad agitates the dirt and grime, while the squeegee collects the dirty water and debris and directs it into the recovery tank. It’s responsible for ensuring that the floor is left clean and dry, ready for immediate use.
How proper squeegee adjustment affects cleaning performance
Proper squeegee adjustment is essential for optimal cleaning performance. When the squeegee is correctly set, it creates a tight seal with the floor, allowing it to collect the dirty water and debris effectively. This ensures thorough cleaning and prevents any excess water from being left behind, which can lead to slippery surfaces and potential safety hazards. Additionally, the right squeegee adjustment ensures that the machine’s suction power is maximized, resulting in faster and more efficient cleaning.
Common issues caused by incorrect squeegee adjustment
Incorrect squeegee adjustment can lead to a range of issues that can negatively impact the cleaning process. For instance, if the squeegee is set too low, it may cause excessive wear and tear on the rubber, leading to reduced lifespan and the need for more frequent replacements.
On the other hand, if the squeegee is set too high, it may not make proper contact with the floor, leaving behind streaks, water trails, or even puddles of dirty water. These issues not only compromise the cleaning results but also waste valuable time and resources.
Here are some common issues caused by incorrect squeegee adjustment:
- Poor water recovery
- Streaks or water trails on the floor
- Puddles or excessive moisture left behind
- Uneven drying of the floor
- Reduced cleaning efficiency
- Increased machine maintenance and repair costs
To avoid these issues and ensure optimal cleaning results, it’s crucial to check and adjust the squeegee on your floor scrubber regularly. Now that we understand the role of the squeegee, the impact of proper adjustment, and the consequences of incorrect adjustment, let’s dive into the steps for adjusting the squeegee on your floor scrubbing machine.
Identifying The Components Of The Squeegee System
When it comes to a floor scrubber, the squeegee system plays a crucial role in ensuring efficient cleaning and drying of the floor surface. Therefore, it is essential to know the different components of the squeegee assembly and understand their functionality. In this section, we will explore the main parts of the squeegee system, delve into the purpose of each component, and discuss key considerations when inspecting the squeegee system for adjustment.
The main parts of the squeegee assembly
The squeegee system consists of several components that work together to remove water and debris from the floor after scrubbing. These main parts include:
- Rubber blades: The rubber blades are attached to the squeegee assembly and come into direct contact with the floor surface. They are responsible for effectively wiping and collecting the water and debris.
- Squeegee frame: The squeegee frame provides support to the rubber blades and holds them in place. It is usually made of durable materials such as stainless steel or plastic.
- Squeegee blades holder: The squeegee blades holder secures the rubber blades to the squeegee frame. It ensures that the blades are positioned correctly for optimal cleaning and drying performance.
- Mounting bracket: The mounting bracket attaches the entire squeegee assembly to the floor scrubber. It allows for easy installation and adjustment as necessary.
Exploring the functionality of each component
Now that we have identified the main components of the squeegee system, let’s understand how each component contributes to the overall functionality:
| Component | Functionality |
| Rubber blades | The rubber blades create a seal against the floor surface, collecting water and debris as the scrubber moves forward. They also ensure proper water recovery during the vacuuming process. |
| Squeegee frame | The squeegee frame provides stability and support to the rubber blades. It helps maintain consistent pressure against the floor surface for effective cleaning and drying. |
| Squeegee blades holder | The blades holder ensures the rubber blades are securely fastened to the squeegee frame, preventing any movement or misalignment during operation. It helps maintain optimal cleaning performance. |
| Mounting bracket | The mounting bracket allows for easy attachment and adjustment of the squeegee assembly to the floor scrubber. It ensures proper positioning for efficient cleaning and drying. |
Key considerations when inspecting the squeegee system
Inspecting the squeegee system is important to ensure proper adjustment for optimal cleaning results. Here are some key considerations to keep in mind:
- Check the condition of the rubber blades: Look for any signs of wear or damage such as cuts or tears. Replace worn-out blades to maintain effective cleaning and drying.
- Inspect the squeegee frame: Ensure that the frame is not bent or damaged, as it can affect the performance of the rubber blades. Straighten or replace the frame if needed.
- Verify the blade holder alignment: Make sure that the blade holder is properly aligned with the squeegee frame. Incorrect alignment can hinder the squeegee’s ability to collect water and debris efficiently.
- Adjust the mounting bracket: Ensure that the mounting bracket allows for proper contact between the rubber blades and the floor surface. Adjust as necessary to achieve optimal cleaning and drying.
By identifying the components of the squeegee system, understanding their functionality, and considering key inspection points, you can effectively adjust the squeegee on your floor scrubber for superior cleaning and drying performance.
Step-By-Step Guide To Adjusting The Squeegee
Adjusting the squeegee on a floor scrubber is crucial for achieving optimal cleaning results. The squeegee helps to remove excess water and cleaning solution from the floor, leaving it clean and dry. In this step-by-step guide, we will walk you through the process of adjusting the squeegee to ensure that it is properly aligned and set up for optimal performance. Let’s get started!
Preparing the floor scrubber for squeegee adjustment
Before adjusting the squeegee, it is important to prepare the floor scrubber properly. Here’s what you need to do:
- Ensure the floor scrubber is turned off and unplugged from the power source. Safety first!
- Clean the squeegee blades thoroughly to remove any dirt, debris, or residue that may affect its performance.
- Inspect the squeegee assembly for any signs of damage or wear. If you notice any worn-out parts, it is advisable to replace them before proceeding with the adjustment.
Assessing the current condition of the squeegee blades
Before making any adjustments, it is important to assess the current condition of the squeegee blades. This will help you determine whether they need to be replaced or simply readjusted. Here’s how you can do it:
- Inspect the squeegee blades for any signs of wear, such as cracks, nicks, or uneven edges.
- If you notice any visible damage, it is recommended to replace the blades with new ones.
- If the blades appear in good condition, check for signs of uneven wear by running your fingers along the blades. If you feel any rough or uneven areas, it indicates that the blades need to be readjusted.
Adjusting the squeegee angle for optimal performance
Now that you have assessed the condition of the squeegee blades, it’s time to adjust the angle. Follow these steps:
- Locate the squeegee adjustment knobs or levers on your floor scrubber. These are usually located near the squeegee assembly.
- Loosen the adjustment knobs or levers to allow for easy movement.
- Adjust the squeegee angle according to the floor surface you are cleaning. For hard floors, a steeper angle is recommended, while a lower angle is better suited for soft or uneven surfaces.
- Tighten the adjustment knobs or levers to secure the squeegee in its new position.
Checking the pressure and height settings of the squeegee
In addition to adjusting the squeegee angle, it is important to check the pressure and height settings to ensure optimal performance. Here’s how:
- Check the pressure gauge on the floor scrubber to ensure that it is set to the recommended pressure for the type of floor surface you are cleaning.
- Adjust the pressure settings if necessary, following the manufacturer’s guidelines.
- Inspect the squeegee height adjustment mechanism and make any necessary adjustments to ensure that the squeegee makes proper contact with the floor surface.
- Once you have adjusted the pressure and height settings, test the floor scrubber on a small area to ensure that the squeegee is working effectively.
Congratulations! You have successfully adjusted the squeegee on your floor scrubber. By following this step-by-step guide, you can ensure that your floor scrubber is performing at its best, leaving your floors clean, dry, and ready to be enjoyed.
Troubleshooting Common Squeegee Adjustment Problems
Properly adjusting the squeegee on your floor scrubber is essential for achieving optimal cleaning results. However, even with the most diligent maintenance routine, issues can arise that require troubleshooting. In this section, we will address some common problems you might encounter with squeegee adjustment and provide practical solutions.
Uneven water recovery: Causes and solutions
When your floor scrubber fails to recover water evenly, it can lead to streaking, poor cleaning performance, and potential slip hazards. This problem can be caused by various factors, such as an incorrectly positioned squeegee or worn blades. Here are some steps to help you troubleshoot and resolve this issue:
- Check the squeegee alignment: Ensure that the squeegee is properly aligned with the floor surface. Misalignment can result in uneven water recovery. Adjust the squeegee position by loosening the locking bolts and repositioning it until it sits flush against the floor. Tighten the bolts securely to lock the squeegee in place.
- Inspect the blades: Worn or damaged blades can contribute to poor water recovery. Inspect the blades for any signs of wear, such as frayed edges or cracks. If the blades are worn, replace them following the manufacturer’s guidelines.
- Verify vacuum motor performance: Insufficient suction power from the vacuum motor can also cause uneven water recovery. Check the vacuum motor for any signs of obstruction or blockage. Clean or replace the filter if necessary. If the problem persists, consult the manufacturer for further assistance.
Streaking or smearing on the floor surface: How to address it
Streaks and smears left on the floor surface after using a floor scrubber can be frustrating and ruin the appearance of your floors. Here are some steps to help you address this issue:
- Inspect the squeegee blade condition: Check the condition of the squeegee blade for any damage or deformities. A damaged blade can cause streaking or smearing. Replace the blade if necessary.
- Adjust the squeegee pressure: Insufficient or excessive squeegee pressure can also lead to streaking. Adjust the pressure according to the floor type and condition. Refer to the floor scrubber’s manual for specific guidelines on adjusting squeegee pressure.
- Clean the squeegee and floor surface: Clean any debris or residue buildup on both the squeegee and the floor surface. Use a mild detergent and warm water to remove any stubborn dirt or grime. Ensure that both the squeegee and floor surface are thoroughly dry before operating the floor scrubber.
Excessive blade wear: Preventive measures and maintenance tips
Excessive blade wear can result in reduced cleaning performance and increased maintenance costs. To prevent premature wear and extend the lifespan of your squeegee blades, consider implementing the following preventive measures and maintenance tips:
- Regularly inspect the squeegee blades for wear and tear. Replace them promptly when signs of damage or deterioration are detected.
- Ensure the floor surface is clean before using the floor scrubber. Debris and grit can accelerate blade wear.
- Avoid operating the floor scrubber on rough or uneven surfaces whenever possible, as it can cause premature blade wear.
- Keep the squeegee blades clean and free from dirt buildup. Regularly clean the blades with a soft brush or cloth.
- Apply a silicone-based blade conditioner to lubricate and protect the squeegee blades periodically.
- Follow the manufacturer’s guidelines for proper squeegee adjustment and maintenance.
By troubleshooting and addressing common squeegee adjustment problems promptly, you can ensure that your floor scrubber delivers optimal cleaning performance and extends the lifespan of your equipment.
Fine-Tuning Your Floor Scrubber’s Squeegee Adjustment Techniques
Experimenting with different squeegee materials and options
When it comes to achieving optimal squeegee performance on your floor scrubber, experimenting with different materials and options is vital. The squeegee plays a crucial role in effectively removing dirty water and leaving your floors clean and dry. Depending on the surface and cleaning requirements, you may find that certain squeegee materials work better than others.
Consider trying out squeegees made of various materials, such as urethane, gum rubber, or latex. Each material may offer different levels of durability, flexibility, and resistance to chemicals or abrasion. By experimenting with different materials, you can determine which squeegee performs best on different floor types and under varying conditions.
Assessing the impact of pad pressure on squeegee performance
Another crucial factor to consider when adjusting the squeegee on your floor scrubber is the pad pressure. The pad pressure refers to the downward force applied by the scrubber’s pad or brush onto the floor. This pressure directly affects the squeegee’s ability to effectively pick up the dirty water.
To fine-tune the squeegee adjustment, you’ll need to find the right balance between pad pressure and squeegee angle. Adjusting the pad pressure too high can result in excessive water being pushed ahead of the squeegee, leaving the floor wet. On the other hand, insufficient pad pressure may cause poor water recovery and streaks on the floor.
It’s essential to regularly assess the impact of pad pressure on squeegee performance by monitoring the condition of the recovered water. If you notice water residue or streaks left behind, consider adjusting the pad pressure to achieve better squeegee efficiency.
Understanding the effect of floor type on squeegee adjustment
The type of floor you are cleaning also plays a significant role in determining the ideal squeegee adjustment. Different floor surfaces, such as concrete, tiles, or vinyl, have unique characteristics that can affect the performance of your scrubber’s squeegee.
For smooth, even surfaces like polished concrete or vinyl, a flat squeegee with minimal blade angle adjustment may provide optimal suction and water pick-up. Conversely, rough or textured surfaces may require a more aggressive blade angle to ensure proper contact with the floor and efficient water recovery.
By understanding the effect of floor type on squeegee adjustment, you can ensure that your floor scrubber operates at its best on a variety of surfaces. Regularly evaluating the condition of the squeegee and making the necessary adjustments will help maintain clean and dry floors throughout your cleaning operations.
Best Practices For Squeegee Maintenance And Care
In order to keep your floor scrubber performing at its best, it’s important to prioritize proper squeegee maintenance and care. The squeegee plays a vital role in the cleaning process, efficiently removing water and debris from the floor surface. Regular cleaning, inspection, and replacement of worn or damaged blades are essential steps for smooth operation. Additionally, lubrication and proper storage techniques can help prolong the lifespan of your squeegee, ensuring optimal performance. Follow these best practices for squeegee maintenance and care to keep your floor scrubber in top-notch condition.
Regular cleaning and inspection of the squeegee system
Regularly cleaning and inspecting your squeegee system is crucial to prevent the buildup of dirt, grime, and debris that can affect its performance. Here are some key steps to ensure your squeegee system remains in excellent condition:
- Clean the squeegee blades thoroughly after each use, removing any leftover residue.
- Inspect the blades for any signs of damage, such as cracks or worn edges.
- Check the mounting hardware to ensure it is tight and secure.
- Remove any obstructions or debris from the squeegee channel.
By incorporating these regular cleaning and inspection practices, you can maintain a properly functioning squeegee system and avoid any issues that may hinder its effectiveness.
Replacing worn or damaged squeegee blades
Over time, squeegee blades can wear down or become damaged, reducing their effectiveness in water and debris removal. To ensure optimal cleaning performance, it’s important to replace worn or damaged blades promptly. Here are some steps to follow when replacing your squeegee blades:
- Identify the correct replacement blades for your specific floor scrubber model.
- Remove the old blades by loosening the mounting hardware.
- Position the new blades correctly and tighten the mounting hardware securely.
Regularly replacing the blades as needed will help maintain the efficiency of your floor scrubber and ensure a thorough cleaning result.
Lubrication and storage tips for prolonging squeegee lifespan
Proper lubrication and storage techniques can significantly prolong the lifespan of your squeegee, ensuring it maintains optimal performance. Consider the following tips:
- Apply a small amount of silicone lubricant to the squeegee blades to reduce friction and prevent sticking.
- Store the floor scrubber in a clean, dry environment to prevent rust or corrosion.
- Keep the squeegee blades elevated off the ground to avoid damage.
By following these lubrication and storage tips, you can extend the lifespan of your squeegee and maximize its effectiveness during cleaning operations.
Remember, proper squeegee maintenance and care are vital for the overall performance of your floor scrubber. Regularly clean and inspect the squeegee system, replace worn or damaged blades, and follow proper lubrication and storage techniques. By incorporating these best practices, you can ensure your floor scrubber operates efficiently, delivering exceptional cleaning results.
Enhancing Your Floor Scrubbing Skills: Mastering Squeegee Adjustment
Importance of Practice and Experience for Squeegee Adjustment
Mastering the art of squeegee adjustment is crucial for achieving effective and efficient floor scrubbing. However, it is not something that can be learned overnight. Just like any skill, it requires practice and experience to perfect. Whether you are a beginner or have been using a floor scrubber for years, taking the time to understand the importance of squeegee adjustment and honing your skills can make a significant difference in your cleaning results.
When it comes to squeegees, the main goal is to achieve optimal contact with the floor surface, ensuring that all dirt, debris, and liquids are efficiently collected. However, this delicate balance can only be achieved through continuous adjustment, based on factors such as the type of flooring, the nature of the debris, and the condition of the squeegee itself. Thus, practice and experience are vital in developing an intuitive understanding of how to adjust the squeegee.
Techniques for Achieving Optimal Squeegee Performance
While there is no one-size-fits-all approach to squeegee adjustment, there are various techniques that can help you achieve optimal performance:
- Experiment with Different Angles: Adjusting the angle of the squeegee can significantly impact its cleaning efficiency. Start by setting it at a neutral position (approximately 0 degrees) and gradually increase or decrease the angle until you find the best setting for your specific cleaning needs.
- Check and Adjust Blade Pressure: Proper blade pressure is essential for optimal squeegee performance. Ensure that the squeegee blade is not too loose or too tight against the floor surface. A simple adjustment might be all it takes to enhance the squeegee’s collection capabilities.
- Monitor and Clean the Squeegee Blade: Over time, the squeegee blade can accumulate dirt and residue, which can hamper its ability to collect debris and liquids effectively. Regularly check and clean the squeegee blade to maintain its optimal performance.
- Consider Using Aftermarket Squeegees: Sometimes, the default squeegee that comes with the floor scrubber may not deliver the desired results. Experimenting with aftermarket squeegees can help you find alternative options that improve your floor scrubbing performance.
Continuous Improvement and Troubleshooting Strategies
Even with practice and experience, squeegee adjustment can sometimes pose challenges. However, by adopting a continuous improvement mindset and employing troubleshooting strategies, you can overcome these hurdles. Here are a few tips to help you troubleshoot and improve your squeegee adjustment:
- Observe and Review: Pay close attention to the performance of your squeegee during floor scrubbing. Observe how it interacts with different surfaces and make a note of any issues you encounter.
- Experiment and Adapt: Don’t be afraid to try different squeegee adjustments and techniques. Experimentation and adaptation are crucial for finding the optimal settings that work best for your specific cleaning needs.
- Seek Professional Guidance: If you are facing persistent challenges with squeegee adjustment, consider reaching out to a professional who can provide expert advice and guidance based on their extensive experience.
Remember, enhancing your floor scrubbing skills goes hand in hand with mastering the art of squeegee adjustment. With continuous practice, experience, and troubleshooting, you can achieve optimal squeegee performance and elevate your floor cleaning results.
Frequently Asked Questions On How To Adjust Squeegee On Floor A Scrubber
How Do You Lower A Squeegee Floor Scrubber?
To lower a squeegee floor scrubber: locate the lowering lever, pull it down, and release the lever gently.
Why Is My Walk Behind Floor Scrubber Not Putting Out Water?
Your walk-behind floor scrubber may not be putting out water due to clogged water lines or a malfunctioning water pump.
Why Is My Floor Scrubber Leaving Streaks?
Streaks on your floor scrubber may be caused by dirt buildup, improper cleaning technique, worn brush or squeegee, or need for a fresh cleaning solution.
How Do You Use A Floor Squeegee?
Use a floor squeegee, and push it across the floor to collect and remove excess water or liquid.
Conclusion
Finally, by following these simple steps to adjust the squeegee on your floor scrubber, you can ensure optimal cleaning performance and prolong the lifespan of your equipment. Regularly check the squeegee assembly for wear and tear, and replace any damaged parts promptly.
Take your time to properly align the squeegee to achieve the best results on different types of floor surfaces. Remember to adjust the pressure settings according to the floor condition and the type of debris being cleaned. Promote safety by keeping the squeegee at the correct height to prevent damage to the equipment and potential tripping hazards.
With these adjustments in place, your floor scrubber will effectively remove dirt and grime, leaving your floors sparkling clean and maintaining a professional and hygienic environment. Invest time in maintaining your equipment, and it will reward you with efficient and effective cleaning results for years to come.

