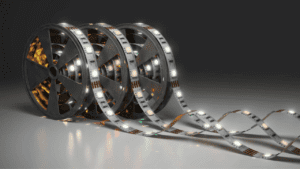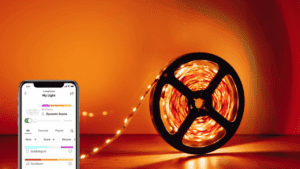
To move LED lights to another house, follow these steps: disconnect the lights from the power source, remove any adhesive or fixtures used for installation, pack the lights securely in bubble wrap or a protective container, and re-install them in the new house using the same method. LED lights have become a popular choice for homeowners due to their energy efficiency and long lifespan.
Whether you are moving to a new house or simply want to rearrange your lighting setup, knowing how to relocate LED lights properly is essential. We will provide you with a step-by-step guide on how to move LED lights to another house.
By following these instructions, you can ensure a smooth transition and enjoy your LED lights in your new space.
Assessing Your Led Lights For Safe Transportation
Moving LED lights to another house can be a safe and hassle-free process. Ensure the transport is handled with care, using proper packaging and securing methods to prevent damage. Take precautions to avoid any potential hazards during the transportation of your LED lights.
By understanding the components of LED lights, checking for damage, and securing the bulbs, you can minimize the chances of any mishaps during the move.
Understanding The Components Of Led Lights:
- LED lights consist of several components: The LED bulbs, heat sinks, electrical drivers, and housing.
- Each component plays a crucial role in the functioning of the LED lights.
- Understanding these components will help you handle and transport the lights with care.
Checking For Any Damage Or Loose Parts:
- Inspect each LED light for any visible damage, such as cracks in the housing or loose components.
- Ensure that all screws and fasteners are securely tightened.
- If you notice any significant damage or loose parts, consider repairing or replacing the lights before the move.
Removing And Securing The Bulbs:
- Begin by turning off the power supply to the LED lights.
- Gently remove the bulbs from their sockets, making sure not to twist or bend them.
- Place the bulbs in a secure container or wrap them individually in bubble wrap to protect them from damage during transit.
Securing The Led Lights For Transportation:
- Start by unplugging the lights and carefully detaching any electrical drivers from the housing.
- If the lights have removable heat sinks, separate them from the housing for added protection.
- Pack each LED light in a separate box, ensuring sufficient padding to prevent any movement.
- Label the boxes with fragile stickers to ensure careful handling during the move.
In Summary
Assessing your LED lights before moving them to another house is crucial to ensure their safe transportation. By understanding the components of LED lights, checking for damage or loose parts, and securely removing and packing the bulbs, you can minimize the risk of any damage during the move.
Remember to handle the lights with care and label the boxes appropriately to ensure they receive the attention they deserve during transportation.
How To Properly Pack Led Lights?
Learn how to properly pack and transport LED lights when moving to a new house. Follow these guidelines to ensure the safety and protection of your LED lights during the relocation process.
Gathering The Necessary Packing Materials:
- Before moving your LED lights to a new house, it is important to gather the necessary packing materials to ensure their safe transportation. Here are the essential items you will need:
- Cardboard boxes: Find sturdy and appropriately sized boxes to fit your LED lights. Reinforced boxes work best for added protection.
- Bubble wrap: Wrap each individual LED light strip with bubble wrap to prevent any damage during the move.
- Packing paper or foam sheets: Place packing paper or foam sheets in the box before placing the LED lights to provide extra cushioning.
- Packing tape: Securely seal the boxes with packing tape to keep the LED lights in place.
- Labels or markers: Use labels or markers to clearly identify the contents of each box, making it easier to unpack in your new home.
Wrapping The Lights Securely For Protection:
- Properly wrapping your LED lights will help protect them from any potential damage during the move. Follow these steps to ensure they are securely wrapped:
- Detach the LED light strips from their power source if applicable.
- Gently coil the LED light strips to prevent tangling.
- Wrap each coil with bubble wrap, making sure to cover the entire length of the strip.
- Secure the bubble wrap with tape to keep it in place.
- For extra protection, place the wrapped LED light strips between layers of packing paper or foam sheets before placing them in a box.
Organizing And Labeling The Packed Lights:
- To make the unpacking process hassle-free, it is crucial to organize and label your packed LED lights properly. Here’s how you can do it effectively:
- Before placing the LED lights in the boxes, take inventory and create a list of what you are packing.
- Place the coiled LED light strips in the labeled boxes, ensuring they are snugly fit to avoid movement during transit.
- Clearly label each box with the contents and any specific instructions such as fragile or handle with care.
- Use color-coded labels or markers to designate different areas of your house where the LED lights will be installed.
- Make a master list of the box labels and their corresponding contents, which will come in handy when unpacking in your new home.

Moving LED lights to another house can be stress-free and damage-free with proper packing techniques. By gathering the necessary materials, securely wrapping the lights, and organizing and labeling the packed boxes, you can ensure a smooth transition and easily set up your LED lights in your new home.
Safely Transporting Led Lights
Learn how to safely move your LED lights to a new house with these easy-to-follow tips. Ensure the lights are properly packed and secured to prevent any damage during transportation.
Transporting LED lights from one house to another requires careful handling to prevent damage and ensure they remain in good working condition. Follow these guidelines to safely move your LED lights:
Choosing The Right Transportation Method to Move LED Lights to Another House
- Consider the distance and mode of transportation when deciding how to move your LED lights.
- If you’re moving locally, you may opt for a personal vehicle. For longer distances, shipping or hiring professional movers might be more appropriate.
Protecting The Lights From Vibrations And Impact
- Before packing the LED lights, remove any delicate or fragile components that could be damaged during transit.
- Wrap each light individually with bubble wrap or packing paper to provide cushioning and protect them from vibrations.
- Place the wrapped lights in sturdy boxes that are specifically made for moving and ensure they fit snugly to prevent movement during the journey.
Securing The Packed Lights In Your Vehicle
- If you choose to transport the LED lights in your own vehicle, ensure they are securely packed to avoid potential damage.
- Place the boxes in a designated area that is stable and won’t be affected by sudden movements.
- Use straps or bungee cords to secure the boxes and prevent them from sliding or falling over during transportation.
Remember, LED lights are sensitive to impact and rough handling, so it’s crucial to take necessary precautions if you like to safely move LED lights to another house. By choosing the right transportation method, protecting the lights from vibrations and impact, and securing the packed lights in your vehicle, you can relocate your LED lights safely and hassle-free.
Setting Up Led Lights In Your New Home
Learn how to move LED lights to your new home with these easy steps. Discover the process of safely uninstalling and reinstalling LED lights for a seamless transition to your new space.
Moving LED lights to a new house can be an exciting but also daunting task. Ensuring that you properly set up your LED lights in your new home is crucial to maintaining their functionality and aesthetics. In this section, we will guide you through the process of unpacking and inspecting the lights, reassembling any disassembled parts, and placing and installing the lights in their new locations.
Unpacking And Inspecting The Lights:
- Carefully unpack the LED lights, ensuring that you do not damage any delicate components.
- Gently remove any protective packaging and inspect the lights for any signs of damage or defects.
- Check the power cords and connectors for any frays, loose connections, or other issues.
- Make sure to read the manufacturer’s instructions and warranty information for any specific unpacking or inspection guidelines.
Reassembling Any Disassembled Parts:
- If you had to disassemble any parts of the LED lights for transport, gather all the components together.
- Consult the manufacturer’s instructions or any diagrams for guidance on how to reassemble the lights properly.
- Ensure that all connectors, wires, and screws are securely fastened to avoid any potential hazards or malfunctions.
- Double-check that you have reassembled the lights correctly before continuing to the next step.
Placing And Installing The Lights In Their New Locations:
- Decide on the desired locations for the LED lights in your new home, taking into consideration factors such as room layout, ambient lighting, and intended use.
- Use a tape measure or other measuring tools to ensure accurate placement of the lights.
- Install any necessary mounting hardware or brackets according to the manufacturer’s instructions.
- Carefully position the LED lights in their designated spots, making sure they are straight and level.
- Connect the power cords of the lights to nearby electrical outlets or extension cords, ensuring a secure and safe connection.
- Test the lights to verify that they are functioning properly before finalizing their installation.
Taking the time to unpack and inspect your LED lights, reassemble any disassembled parts, and place and install them correctly in your new home will result in a seamless transition and maximize the enjoyment of your LED lighting setup.
Troubleshooting And Maintenance Tips For Reinstalling Led Lights
Looking to move LED lights to a new house? Check out these troubleshooting and maintenance tips for reinstalling them without any hassle.
Testing The Lights Before Installation
Before reinstalling LED lights in your new home, it’s important to test them to ensure they are in good working condition. Here are a few steps to follow during the testing process:
- Start by checking the wiring connections: Ensure that all connections are securely attached and not damaged.
- Inspect the power source: Make sure the power source is functioning correctly and supplying the appropriate voltage. Test the outlet or power supply with a multimeter if necessary.
- Check the LED driver: Verify that the LED driver is operational and not defective. This component controls the power input to the LEDs.
- Test individual LED bulbs: If your LED lights consist of multiple bulbs, test each one individually to ensure they are all working properly.
Addressing Any Malfunctions Or Lighting Issues
If you encounter any malfunctions or lighting issues during the testing process or after the installation, it’s important to troubleshoot and address them promptly. Here are a few tips to help you fix common LED lighting problems:
- Check for loose or faulty connections: Ensure that all connections are secure and free from any damage. Loose connections can cause flickering or intermittent lighting issues.
- Inspect the LED driver: If the lights are not working, the LED driver might be the culprit. Check if it’s supplying the appropriate voltage and replace it if necessary.
- Look for damaged LED bulbs: If specific bulbs are not lighting up or flickering, they may be damaged. Replace any faulty bulbs with new ones.
- Update firmware or drivers: In some cases, software or firmware updates might be needed for certain LED light systems. Check the manufacturer’s website for any available updates and install them if needed.
Properly Maintaining The Lights For Long-Term Use
Proper maintenance of LED lights is essential for their longevity and optimal performance. Here are a few maintenance tips to ensure your LED lights last for years to come:
- Regular cleaning: Dust and dirt accumulation can reduce the brightness of LED lights. Clean the fixtures and bulbs regularly using a soft cloth or a gentle cleaning solution.
- Avoid overheating: LED lights generate less heat compared to traditional lighting, but excessive heat can still affect their performance. Ensure proper ventilation around the fixtures and avoid covering them with any materials that can trap heat.
- Protect against power surges: Power surges can damage LED lights. Install surge protectors or use voltage regulators to safeguard the lights from sudden voltage spikes.
- Check for water damage: If your LED lights are installed outdoors or in wet areas, ensure that they are adequately sealed and protected from water ingress. Water damage can cause electrical issues and reduce the lifespan of the lights.
- Regularly inspect connections: Periodically check the wiring connections to ensure they are secure and not corroded. Corrosion can affect electrical conductivity and lead to lighting problems.
By following these troubleshooting and maintenance tips, you can ensure a smooth and successful LED light transition to your new home. Take care of these essential steps to enjoy the benefits of energy-efficient and long-lasting lighting in your new space.
How to make LED lights sticky again?
To make LED lights sticky again, clean the surface with rubbing alcohol and water, then apply adhesive tape to the back of the lights. LED lights are popular for homeowners and businesses due to their energy efficiency and longevity.
However, over time, the adhesive on the back of the lights may lose its stickiness, causing them to fall off. This can be frustrating, especially if the lights are applied in hard-to-reach areas. Fortunately, there is a simple solution. By following a few steps, you can revive the stickiness of your LED lights and ensure they stay in place securely.
We will discuss how to make LED lights sticky again, allowing you to enjoy their benefits without hassle. Keep reading to find out the steps you need to follow.
Why Sticky Led Lights Are Essential
Sticky LED lights are essential due to their durability and safety features. Their stickiness ensures the lights stay securely in place, even in high-traffic areas or when exposed to vibrations. This prevents any potential accidents or damage caused by loose or falling lights.
In addition to their practicality, sticky LED lights also enhance the appearance of a space. Whether for decorative purposes or to provide adequate lighting, these lights add a touch of elegance and ambiance to any room.
Moreover, the installation process of sticky LED lights is straightforward. They can be effortlessly applied to various surfaces such as walls, ceilings, or furniture with adhesive backing. This eliminates the need for drilling or complex wiring, making it accessible and convenient for everyone.
In conclusion, sticky LED lights are not only essential for their durability and safety but also for the enhanced appearance they provide. The easy installation process makes them a popular choice for homeowners and businesses.
Causes Of Sticky LED Lights
Exposure to heat can cause LED lights to become sticky. When LEDs are constantly exposed to high temperatures, the adhesive used to secure them may melt or weaken, resulting in stickiness. This can happen in settings such as outdoor lighting or when LED lights are installed near heat sources, such as ovens or heaters.

Moisture and humidity are another cause of sticky LED lights. Water or excessive moisture can seep into the adhesive and affect its ability to maintain a strong bond. This is especially true in environments with high humidity levels or areas where LED lights are regularly exposed to water, such as bathrooms or kitchens.
Additionally, the use of low-quality adhesive during the manufacturing process can lead to stickiness in LED lights. Inferior adhesive materials may need the necessary strength or durability, causing the lights to become tacky over time.
How To Remove Sticky Residue From LED Lights?
When making LED lights sticky again, removing any sticky residue from the lights is essential. Gather materials like alcohol solution, warm, soapy water, and a soft cloth. Start by cleaning the lights with the alcohol solution, which helps to dissolve the sticky residue.
Dampen the cloth with the solution and gently wipe the lights, focusing on the sticky areas. If the residue persists, try soaking the lights in warm, soapy water for a few minutes. After soaking, scrub the lights gently with a soft cloth or sponge to remove any remaining stickiness.
Once the lights are clean, dry them thoroughly before using them again. With these simple steps, you can easily make your LED lights sticky-free and ready to shine brightly once more.
Methods To Make LED Lights Sticky Again
Choosing the suitable adhesive Applying adhesive on the backside Using heat to reactivate adhesive Pressing firmly to ensure proper adhesion
When choosing a suitable adhesive, it is essential to consider the surface of the LED lights and the material it will be attached to. Look for adhesives that are specifically designed for electronics and provide strong adhesion.
Before applying adhesive on the backside of the LED lights, clean the surface thoroughly to remove any dust or dirt. Apply a thin adhesive layer evenly on the backside, covering the entire surface. Using heat can help reactivate the adhesive on LED lights.
Gently heat the backside of the lights using a hairdryer or heat gun until the adhesive becomes sticky again. Be careful not to overheat the lights. After applying the adhesive, press the LED lights firmly against the desired surface to ensure proper adhesion.
Apply consistent pressure for a few moments to allow the adhesive to bond effectively.
Frequently Asked Questions Of How To Move Led Lights To Another House?
Can You Take Led Lights Off And Put Them Somewhere Else?
Yes, you can easily remove LED lights and relocate them to another place.
Can You Reattach Led Strips?
Yes, LED strips can be reattached easily by following a few simple steps.
Are Led Strip Lights Easy To Remove?
LED strip lights are easy to remove thanks to their adhesive backing, making it a simple process.
How Do You Reconnect Led Strips After Cutting?
To reconnect LED strips after cutting, you can use soldering or connectors for a secure and reliable connection.
Is There A Way To Fix Led Lights That Won’T Stick Anymore?
If your LED lights no longer stick, try cleaning the surface where you want to attach them with rubbing alcohol. This will remove any dirt or oils that could prevent the adhesive from sticking. You can also apply heat to the adhesive with a hairdryer to reactivate it and create a better bond.
Why Are My LED Lights Falling Off?
LED lights can fall off for various reasons, such as improper surface preparation, weak adhesive, or extreme temperature changes. Ensure that the surface is clean and dry before attaching the lights. Consider using a stronger adhesive tape or glue if the adhesive is weak.
Extreme temperature changes can weaken the adhesive, so avoid placing the lights in areas with frequent temperature fluctuations.
Conclusion
Moving LED lights to another house can be a straightforward process if you follow the right steps. First, make sure to prepare your lights for transportation by carefully removing them from their current location. Then, pack them securely in protective wrapping to prevent any damage during the move.
Next, when you arrive at your new house, plan out where you want to install your LED lights to ensure optimal placement and functionality. Remember to consult the user manual or manufacturer’s instructions for any specific guidelines. Once you have determined the placement, reinstall your lights with care, making sure all connections are secure.
Finally, test your lights to ensure they are working properly in their new location. By following these steps, you can safely and easily move your LED lights to another house, allowing you to enjoy their benefits in your new space.

