To re-stick LED lights, first, clean the surface thoroughly and then use a strong adhesive to attach them firmly. Now, let’s dive into a detailed explanation of how to re-stick LED lights effectively.
LED lights have become extremely popular due to their versatility and energy efficiency. They can be used for various purposes, whether it’s decorating your home, enhancing your car’s interior, or creating a vibrant atmosphere for events. However, over time, the adhesive that holds the LED lights in place may weaken, causing them to fall off.
Understanding Led Lights And Adhesion
LED lights are known for their longevity and energy efficiency. However, over time, these lights may lose their adhesive properties. To re-stick LED lights, ensure the surface is clean and dry, remove the backing, and carefully press the lights onto the desired area.
Different types of LED lights and their applications:
- SMD LED lights: These surface-mounted devices are small, compact, and commonly used in various electronic devices, including TVs, smartphones, and automotive lighting. They offer vibrant colors, low power consumption, and long lifespan.
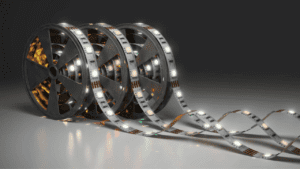
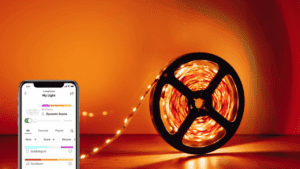
- Flexible LED strips: These versatile lights are made up of several individual LED bulbs mounted on a flexible strip. They can be easily bent and shaped, making them ideal for decorative purposes, such as accent lighting in homes, restaurants, and shops.
- High-power LED modules: Designed for illuminating larger areas, these modules are used in applications like outdoor signage, architectural lighting, or area lighting in stadiums and parking lots. They emit high-intensity light and require appropriate thermal management.
- LED light bulbs: LED replacements for traditional incandescent and fluorescent bulbs, they are energy-efficient and eco-friendly alternatives. LED light bulbs are widely used for general lighting purposes in homes, offices, and commercial spaces.
The importance of proper adhesive for LED lights:
- Proper adhesive selection is crucial for successful LED light installation to ensure long-term adhesion and prevent any safety hazards.
- A suitable adhesive should provide excellent bonding strength, withstand fluctuations in temperature, and protect against moisture and vibrations.
- The adhesive should also be compatible with the surface material and meet required fire safety standards.
Factors that affect the adhesion of LED lights
Surface preparation:
- The surface should be clean, dry, and free from any dust, dirt, grease, or other contaminants.
- Use a mild detergent and water solution or isopropyl alcohol to clean the surface thoroughly.
- If necessary, sand the surface lightly to create a rough texture, promoting better adhesive bonding.
Environmental conditions:
- Temperature can impact the adhesive’s performance, so ensure the installation environment is within the adhesive manufacturer’s recommended temperature range.
- High humidity can affect the curing process of some adhesives. Avoid installing LED lights in excessively humid conditions.
- Direct exposure to sunlight may degrade certain adhesives over time, causing them to lose their adhesive capability.
Quality of adhesive:
- Choose an adhesive specifically formulated for bonding LED lights to different surfaces, ensuring it offers the necessary adhesion strength and durability.
- Check for certifications and quality standards compliance, such as UL or RoHS, to ensure the adhesive meets safety and environmental requirements.
- It’s recommended to follow the adhesive manufacturer’s instructions for proper application and curing time.
Understanding LED lights and the factors that affect their adhesion is essential to maximize their performance and longevity. By choosing the right adhesive and preparing the surface adequately, you can ensure a secure and long-lasting installation.
Preparing The Surface For Re-Sticking Led Lights
To re-stick LED lights, start by preparing the surface. Clean it thoroughly, removing any dirt or residue. Then, use adhesive strips or glue dots for a secure reattachment.
Removing Old Adhesive Residue:
- Start by gently peeling off the LED lights from the surface. Be careful not to damage the lights or the surface in the process.
- If any adhesive residue remains, use a plastic scraper or your fingernails to remove it. Avoid using sharp tools that could scratch the surface.
Cleaning The Surface Thoroughly:
- Use a mild detergent or soap mixed with water to clean the surface where the LED lights were stuck. Wipe it with a soft cloth or sponge, removing any dirt, dust, or grime.
- Make sure to dry the surface completely before proceeding to the next step.
Sanding Or Roughening The Surface (If Necessary):
- If the surface is smooth or glossy, sanding or roughening it can help with better adhesion.
- Use fine-grit sandpaper to gently rub the surface, creating a textured finish. Take caution not to damage the surface or create visible scratches.
Applying A Primer (Optional):
- Before re-sticking the LED lights, you may consider applying a primer to enhance the adhesive bond.
- Choose a primer suitable for the surface material and follow the manufacturer’s instructions for application.
- Allow the primer to dry completely before moving on to the next step.
Remember, properly preparing the surface is crucial for effective re-sticking of LED lights. Follow these steps accordingly to ensure a strong and long-lasting adhesion.
Choosing The Right Adhesive For Long-Lasting Adhesion
Choosing the perfect adhesive is crucial for ensuring long-lasting adhesion when re-sticking LED lights. Find the right adhesive that offers excellent strength and durability to keep your LED lights in place securely.
Different Types Of Adhesives Suitable For Led Lights
LED lights are a popular choice for adding ambiance and illumination to various spaces. However, ensuring that they stay securely in place can be a challenge. To keep your LED lights firmly in position, it is essential to choose the right adhesive.
Here are some different types of adhesives suitable for LED lights:
- Epoxy adhesive: Epoxy adhesives are known for their exceptional strength and durability. They create a strong bond between surfaces, including LED lights and various materials.
- Silicone adhesive: Silicone adhesives are highly flexible and have excellent temperature resistance. They work well with LED lights and can provide a reliable bond on different surface materials.
- Double-sided adhesive tape: Double-sided adhesive tape is a convenient and easy-to-use option for sticking LED lights. It typically has strong adhesion and can adhere well to most surface materials.
- Thermal conductive adhesive: LED lights generate heat during operation, and using a thermal conductive adhesive can help with heat dissipation. These adhesives have excellent thermal conductivity properties and can ensure the longevity of your LED lights.
- UV cured adhesives: UV cured adhesives are cured using ultraviolet light. They offer fast curing times and high strength bonds. They are particularly suitable for bonding clear materials and can be a good choice for certain types of LED lights.
Considering The Surface Material re-stick LED lights
Choosing the correct adhesive for LED lights involves considering the surface material where they will be applied. Different materials may require specific types of adhesives to achieve optimal adhesion. Some common surface materials to consider include:
- Metal: Adhesives suitable for metal surfaces should have excellent bonding strength and be resistant to corrosion. Epoxy adhesives and certain types of silicone adhesives perform well on metal surfaces.
- Plastic: When adhering LED lights to plastic surfaces, it is essential to select adhesives compatible with various types of plastics. Silicone adhesives are often a suitable choice for plastic materials due to their flexibility and compatibility.
- Glass: LED lights on glass surfaces can benefit from adhesives that provide transparent and strong bonds. UV cured adhesives are frequently used for bonding glass and LED lights together.
- Wood: Adhesives with good bonding strength and flexibility are ideal for LED lights on wood surfaces. Epoxy adhesives and certain types of silicone adhesives can work well on wood.
Understanding The Adhesive’s Properties And Compatibility With Led Lights
To ensure a long-lasting adhesion of LED lights, it is crucial to understand the properties of the adhesive and its compatibility with LED lights. Consider the following factors:
- Flexibility: LED lights may experience vibrations or movements, so selecting adhesives with good flexibility can help prevent them from detaching.
- Transparency: If you want the adhesive to be invisible, opt for transparent adhesives that do not affect the appearance of the LED lights.
- Temperature resistance: LED lights can generate heat, so it is essential to choose adhesives that are heat resistant and can withstand the operating temperature of the LEDs.
- Waterproof properties: If the LED lights are exposed to moisture or will be installed in wet areas, using waterproof adhesives can prevent damage and ensure the lights remain securely attached.
Evaluating Adhesive Strength And Durability:
The strength and durability of the adhesive are crucial for long-lasting adhesion of LED lights. Consider the following aspects when evaluating adhesive strength:
- Bonding strength: The adhesive should offer sufficient bonding strength to hold the LED lights firmly in place. Refer to the adhesive’s specifications to determine its maximum load capacity.
- Durability: LED lights often have long lifespans, and the adhesive should also withstand the test of time. Look for adhesives that are known for their durability and resistance to aging, UV rays, and environmental conditions.
- Easy removal if needed: While you want the adhesive to provide a strong bond, it should also be possible to remove the LED lights without damaging the surface or leaving residue, especially if you plan to reposition or replace the LED lights in the future.
By carefully considering the different types of adhesives, evaluating their compatibility with surface materials, understanding their properties, and ensuring their strength and durability, you can select the right adhesive for long-lasting adhesion of your LED lights.
Applying The Adhesive To Re-Stick Led Lights
Discover how to easily re-stick LED lights by applying adhesive correctly. Follow these simple steps for a hassle-free solution. Illuminate your space with re-stuck LED lights today!

Ensuring Proper Alignment And Positioning
Before applying adhesive to re-stick LED lights, it is crucial to ensure their proper alignment and positioning. Follow these steps for a secure attachment:
- Clean the surface: Begin by cleaning the surface where the LED lights will be re-stuck. This ensures better adherence and prevents any debris from interfering with the adhesive.
- Mark the desired placement: Use a pencil or tape to mark the exact position where you want the LED lights to be placed. This step helps to maintain proper alignment and symmetry.
- Double-check the alignment: Before applying the adhesive, make sure the LED lights are aligned correctly by comparing the marked positions with the actual placement. This step helps avoid any misalignment issues later.
Applying The Adhesive Evenly
Once the LED lights are correctly aligned, the next step is to apply the adhesive evenly. Follow these guidelines for a secure and long-lasting attachment:
- Choose the right adhesive: Ensure that you select an adhesive specifically designed for attaching LED lights. Look for adhesives with strong bonding properties and suitable for your surface type.
- Apply a thin layer: Using a small brush or applicator, apply a thin and even layer of adhesive to the backside of the LED lights. Avoid applying too much adhesive, as it may result in overflow or uneven attachment.
- Spread the adhesive evenly: Use the brush or applicator to spread the adhesive evenly across the entire backside of the LED lights. This step ensures that the adhesive is distributed uniformly, providing a stable bond.
Securing The Led Lights In Place
After applying the adhesive, it is essential to secure the LED lights in place to allow for proper bonding. Follow these steps to ensure a firm attachment:
- Press firmly: Gently press the LED lights onto the marked positions with sufficient force to ensure a secure bond between the adhesive and the surface. Applying uniform pressure helps eliminate air gaps and promotes better adhesion.
- Hold in position: Once the LED lights are pressed onto the surface, hold them in place for a few seconds. This action allows the adhesive to grab onto the surface and initiate the bonding process.
- Apply additional support if needed: For larger LED light installations or areas with higher movement, consider using additional support such as clips or brackets to hold the lights in position while the adhesive cures further.
Allowing Sufficient Curing Time
To ensure a durable and long-lasting attachment, it is essential to allow sufficient time for the adhesive to cure. Follow these guidelines for optimal results:
- Follow adhesive manufacturer’s instructions: Different adhesives have different curing times. Refer to the manufacturer’s instructions to determine the specific curing time for the adhesive you used. It is crucial to follow these instructions precisely.
- Avoid disturbing or moving the LED lights: During the curing process, avoid any unnecessary movement or disturbance of the LED lights. This can disrupt the bonding process and compromise the effectiveness of the adhesive.
- Wait for complete curing: Resist the temptation to test the LED lights too soon. Allow the adhesive to fully cure based on the manufacturer’s recommended time. This ensures a strong and reliable bond between the LED lights and the surface.
Remember, by following these guidelines and ensuring proper alignment, evenly applied adhesive, secure attachment, and sufficient curing time, you can successfully re-stick LED lights and enjoy well-lit spaces once again. Also you can reset LED lights.
Maximizing Long-Lasting Adhesion Of Re-Stuck Led Lights
To maximize the long-lasting adhesion of re-stuck LED lights, follow these simple steps. Clean the surface thoroughly, apply adhesive tape evenly, press firmly, and let it set for a few hours. Avoid excessive handling or movement to ensure a strong and durable bond.
LED lights are a popular choice for their energy efficiency and vibrant illumination. However, over time, the adhesive holding them in place may weaken or fail. To ensure the longevity of your re-stuck LED lights, it’s important to follow proper maintenance and cleaning techniques, avoid exposure to extreme temperatures or moisture, regularly check for loose or damaged connections, and replace adhesive as needed.
Proper Maintenance And Cleaning Of Led Lights:
- Regularly dust the surface of LED lights using a soft, lint-free cloth to remove any accumulated dirt or debris.
- Gently wipe the lights with a mild cleaning solution or a mix of water and vinegar to remove stubborn stains or marks.
- Avoid using harsh chemicals or abrasive materials that may damage the surface of the LED lights.
- Ensure the lights are completely dry before re-sticking them to any surface.
Avoiding Exposure To Extreme Temperatures Or Moisture:
- LED lights are sensitive to extreme temperatures, so it’s crucial to avoid exposing them to excessive heat or cold.
- Avoid installing LED lights near heat sources such as stoves, radiators, or ovens, as the high temperatures can lead to adhesive failure.
- Similarly, avoid placing the lights in areas prone to high humidity or moisture, as it can weaken the adhesive and cause the lights to detach.
Regularly Checking For Loose Or Damaged Connections:
- Periodically inspect the LED lights to ensure that all connections are secure and in good condition.
- Check for loose or frayed wires and replace them immediately to prevent electrical hazards or unreliable operation.
- If any components of the LED lights are damaged or malfunctioning, replace them with high-quality replacement parts.
Replacing Adhesive As Needed:
- Over time, the adhesive used to stick LED lights may degrade or lose its effectiveness. Inspect the lights regularly and replace the adhesive if necessary.
- When purchasing adhesive, ensure that it is suitable for the specific surface and weight of the LED lights.
- Clean the surface thoroughly before applying the new adhesive, and follow the manufacturer’s instructions for proper application and curing time.
Remember, by following these practices of proper maintenance, avoiding extreme temperature and moisture exposure, regularly checking connections, and replacing adhesive as needed, you can maximize the long-lasting adhesion of your re-stuck LED lights. So go ahead and enjoy the brilliant illumination they provide without any worry of them coming loose.
Troubleshooting And Common Challenges
Learn how to easily re-stick your LED lights to any surface with these troubleshooting tips. Say goodbye to common challenges and enjoy the perfect lighting ambiance hassle-free.
LED lights falling off despite re-sticking efforts:
- LED lights may sometimes fall off even after re-sticking them. This can be frustrating, but there are a few possible reasons why this may occur.
- One common reason is that the surface where the LED lights are being stuck may not be clean and free from dust or debris. This can prevent the adhesive from properly adhering to the surface.
- Another possibility is that the adhesive on the LED lights may not be strong enough for the specific surface. Some adhesives work better on certain materials than others.
- Additionally, if the LED lights were previously stuck to a surface and removed, the adhesive may not work as effectively the second time around.
- To address these issues, here are some tips that can help improve the adhesion of LED lights:
- Before sticking the LED lights, ensure that the surface is clean and free from any dust or debris. Use a mild cleanser or rubbing alcohol to thoroughly clean the area.
- Consider using a stronger adhesive, such as double-sided tape or adhesive pads, which can provide better adherence to various surfaces.
- If the LED lights were previously stuck somewhere, try removing the old adhesive and cleaning the surface before re-sticking them. This may improve the bond between the lights and the surface.
Adhesive not adhering properly to the surface
Sometimes, the adhesive used on LED lights may not adhere properly to the desired surface. This can pose a challenge when trying to stick the lights securely.
One possible reason for this issue is that the adhesive may not be compatible with the surface material. Certain materials, such as plastics or uneven surfaces, may require a different type of adhesive to achieve better adhesion.
Another reason could be improper preparation of the surface before applying the adhesive. If the surface is dirty, greasy, or uneven, the adhesive may not stick as effectively.
To address this problem, consider the following tips:
- Ensure that the adhesive you are using is suitable for the specific surface material. There are various types of adhesives available, such as silicone-based or acrylic-based, which may work better on different surfaces.
- Thoroughly clean and prepare the surface before applying the adhesive. Use a mild cleanser or rubbing alcohol to remove any dirt, grease, or residue. Smooth out any rough areas or uneven surfaces for better adhesion.
- If the adhesive still does not adhere properly, you may try using a different adhesive product specifically designed for challenging surfaces or seek professional advice.
Issues with alignment or positioning of LED lights
Another common challenge when re-sticking LED lights is achieving the desired alignment and positioning. It can be frustrating when the lights end up crooked or unevenly spaced.
Improper alignment can occur due to various reasons, such as rushing the installation process or not measuring and marking the layout beforehand.
To overcome alignment and positioning issues, consider the following tips:
- Take your time to plan and measure the desired layout of the LED lights before sticking them. Use a ruler or measuring tape to ensure proper spacing and alignment.
- Use a pencil or temporary markers to mark the positions where the lights should be stuck. This can help guide you during the installation process and ensure a more accurate alignment.
- Start attaching the LED lights from one end and work your way towards the other, maintaining the desired alignment and spacing. This method can help maintain consistency throughout the installation.
Remember, troubleshooting and resolving challenges with LED lights falling off, adhesive not adhering properly, or issues with alignment and positioning require patience and attention to detail. By following these tips and considering the specific circumstances, you can make your LED lights more secure and achieve the desired outcome.
Frequently Asked Questions Of How To Re Stick Led Lights
How Do You Get Led Lights To Stick Again?
To get LED lights to stick again, clean the surface, use adhesive tape or glue, and apply pressure.
What Is The Best Way To Restick Led Strip Lights?
To restick LED strip lights, clean the surface, apply new adhesive backing, and firmly press the strip onto the desired location.
How Do You Reconnect Led Strip Lights?
To reconnect LED strip lights, simply follow these steps:
- Turn off the power supply to the LED strip lights.
- Cut the strip at the designated reconnect point.
- Remove the protective covering from the cut ends.
- Align the copper pads of the two cut strips.
- Apply solder or connector clips to connect the strips securely.
- Test the connection by turning on the power.
Remember to exercise caution and follow manufacturer instructions for safe and proper reconnection of LED strip lights.
What Kind Of Glue To Use On Led Lights?
For LED lights, use a glue that is specifically designed for electronics.
Conclusion
To conclude, these simple tips and tricks can help you re-stick LED lights and keep them securely in place. By cleaning the surface thoroughly before applying adhesive, using the appropriate adhesive for the surface, and applying consistent pressure, you can ensure that your LED lights stay put.
Additionally, considering alternative mounting options such as using adhesive clips or brackets can also be effective. Remember to read the manufacturer’s instructions and follow them carefully for the best results. With a little patience and attention to detail, you can easily re-stick your LED lights and enjoy their bright and vibrant illumination for a long time.
Happy re-sticking!

